Boat Cleats: What Every Boating Student Must Know
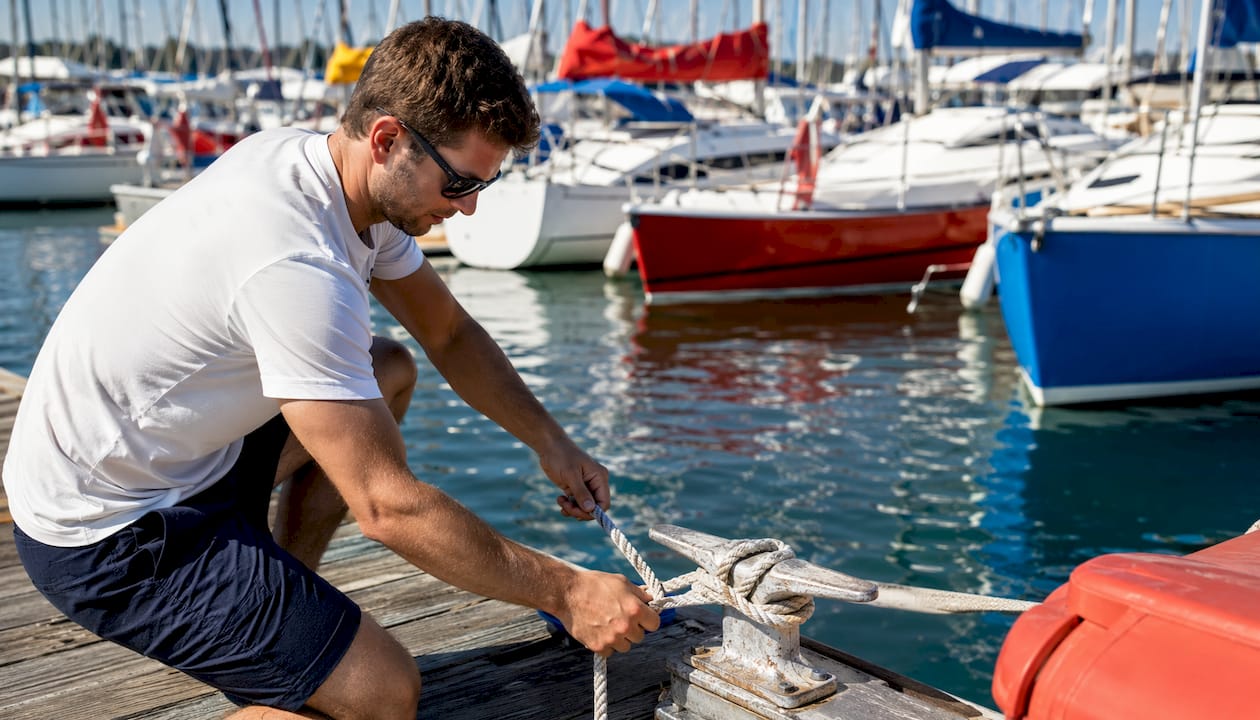
A boat cleat is an engineered tie-off point, fixed to a deck or dock, that secures mooring and dock lines under load. The single most important principle for certification candidates: match cleat size, material, and mounting method to the expected line load and substrate. Get that wrong, and no knot technique saves you.
Before your exam or your first solo docking, know these three things:
- Identify the type: Horn (anvil), cam, jam/clam, pop-up, or bitt. Each has a specific role.
- Inspect the mount: Check backing plate presence, bolt security, and sealant condition before every departure.
- Tie it correctly: The cleat hitch is the standard. Practice it until it takes under ten seconds.
Table of Contents
- What types of boat cleats do you need to know?
- How do you tie a cleat hitch correctly?
- How do you dock safely using cleats?
- What are the installation basics for mounting cleats?
- How do you inspect and maintain cleats?
- What mistakes cause cleat failures?
- What tools and materials does cleat installation require?
- How does cleat knowledge show up in boating certification?
- Key Takeaways
- Why practice and inspection matter more than most students expect
- Get certified with hands-on cleat and docking training
- Useful sources
- FAQ
What types of boat cleats do you need to know?
Horn cleats) are the most common design on docks and small-to-medium powerboats. Two projecting horns accept a figure-eight wrap, making them reliable for primary mooring. They come in stainless steel, aluminum, galvanized steel, and reinforced nylon.
Cam and jam/clam cleats are quick-release line-control devices used on sailboats and small craft. A cam cleat grips the line under spring tension; a jam cleat uses a tapered slot. Neither is a primary mooring point for heavy loads. They excel at sheet and halyard management where fast adjustment matters.
Pop-up and flush cleats sit recessed in the deck and spring up when needed. They eliminate tripping hazards in high-traffic cockpits and side decks. Installation requires a precise cutout, a supplied backing plate, and drain routing to prevent standing water in the canister.
Bitts are heavy-duty vertical posts used on larger vessels and commercial docks for high-load mooring. They distribute force differently than horn cleats and require substantial structural backing.
Material selection is not cosmetic. Grade 316 stainless is the standard for saltwater environments. Reinforced nylon and aluminum are practical, lower-maintenance choices for freshwater or lighter-duty applications where corrosion pressure is lower.
Pro Tip: Use Pearce Marine’s sizing formula as a starting point: cleat length (in inches) = boat length (ft) × 0.2. A boat’s cleat length should be proportional to its length, typically using a formula where cleat length in inches equals the boat length in feet multiplied by a factor.
How do you tie a cleat hitch correctly?
The cleat hitch secures a line with a lead wrap, a figure-eight pattern, and a locking half-hitch. It is the knot examiners expect you to demonstrate cleanly.
- Lead the line to the cleat horn farthest from the load direction. Wrap once around the base of the cleat.
- Cross over the top of the cleat to the opposite horn, pulling the line under that horn.
- Repeat the figure-eight pattern once more across the top.
- Finish with a half-hitch: form an underhand loop in the line and slip it over the near horn. Pull snug.
Common mistakes that fail exams and create real risk:
- Starting on the wrong horn (reduces holding power immediately)
- Skipping the finishing half-hitch (line can work loose under surge)
- Leaving slack in the figure-eight wraps
- Wrapping a line around a hand or wrist while under load
Never take a quick-release shortcut on a primary mooring line. A line that slips free in a current or wake can injure crew and damage adjacent vessels.
Pro Tip: Practice the cleat hitch with gloves on and eyes closed. If you can tie it cleanly under those conditions, you can tie it in wind, rain, and low light.
How do you dock safely using cleats?
Approach slowly, shift to neutral early, and let momentum carry the vessel to the dock. Speed is the most common cause of docking damage.
The standard sequence for safe boat mooring:
- Deploy fenders before the approach.
- Assign a crew member to handle the first line.
- Secure the spring line first when current or wind is a factor. Spring lines run diagonally from a midship cleat to a dock cleat, controlling fore-and-aft movement.
- Cleat the bow line, then the stern line.
- Adjust all lines for equal tension with no slack.
Spring lines are the most underused tool in recreational docking. Attaching a forward spring from the midship cleat to a dock cleat aft of the boat lets you use a brief burst of forward throttle to pull the stern in without crew scrambling. In crosswinds or strong current, situational awareness during the approach determines whether the spring line saves you or you never needed it.
Docking is a sequence, not a scramble. Plan the line order before you enter the slip. Improvising under load is where cleats get overloaded and crew get hurt.
Instructors at NASBLA-aligned courses test whether students can describe this sequence verbally and execute it under simulated conditions.
What are the installation basics for mounting cleats?
Always through-bolt into structural framing with a backing plate. Wood screws and lag bolts alone will pull through under surge load.
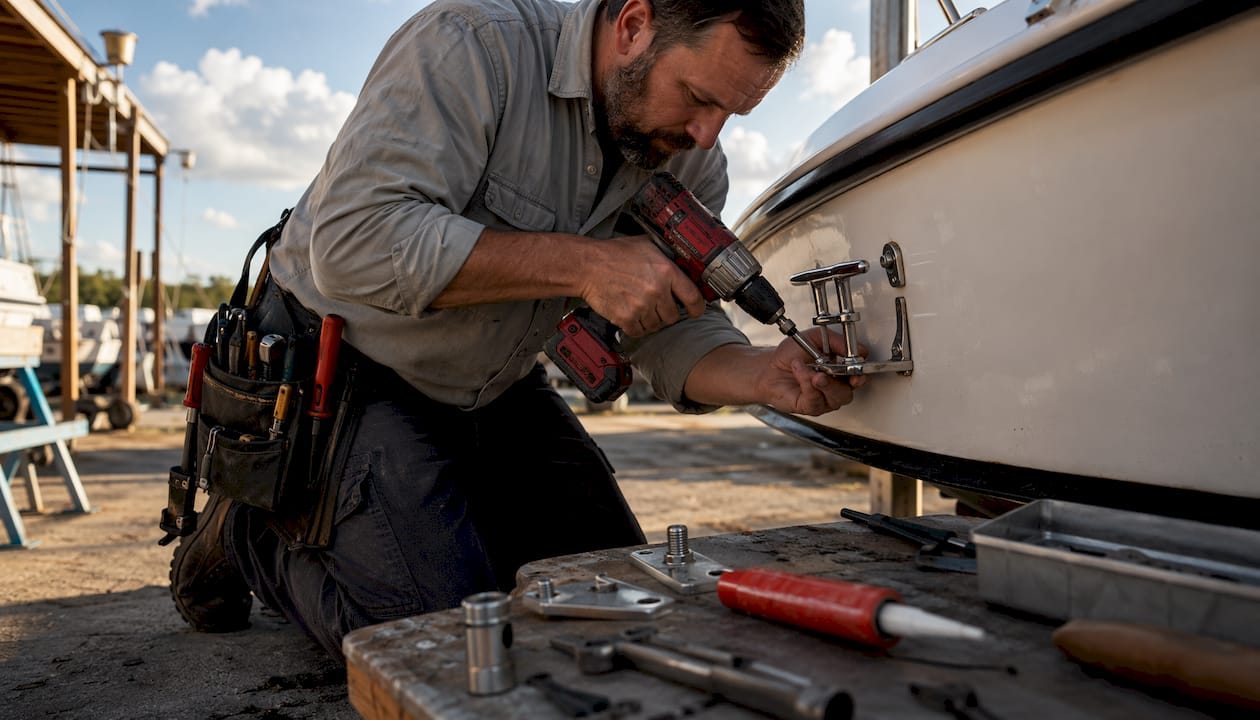
Backing plates should be at least four times the bolt diameter. Acceptable materials: Grade 316 stainless, marine-grade aluminum, or epoxy-sealed marine plywood. Each has different thickness requirements and load-distribution characteristics.
Bolt sizing follows cleat length. The Dock Shop specifies 5/16" bolts for 6–8" cleats and 3/8" bolts for 10" cleats as a general reference. Always use stainless lock-nuts and washers.
Sealant choice matters. Flexible, UV-resistant marine-grade sealants such as Life-Seal allow future hardware removal and handle thermal expansion. Rigid adhesives like 3M 5200 bond permanently, making future service difficult. Pearce Marine specifically recommends flexible sealants over rigid adhesives for cleat installations.
Re-torque fasteners after 24–48 hours once sealant has settled and material movement has occurred.
| Substrate | Recommended approach |
|---|---|
| Fiberglass | Through-bolt, stainless backing plate, flexible sealant |
| Marine plywood/timber | Through-bolt, epoxy-sealed plywood backing plate, flexible sealant |
| Aluminum | Through-bolt, aluminum backing plate, isolating washers to prevent galvanic corrosion |
| Composite decking | Through-bolt, stainless backing plate; verify core density before drilling |
Pro Tip: When the underside of a mounting surface is inaccessible, use stainless rivet-nuts (riv-nuts) or add an access hatch. Never rely on surface fasteners alone when you cannot install a true backing plate.
How do you inspect and maintain cleats?
Inspect cleats before every departure. A deeper hardware check belongs in your seasonal routine.
Pre-departure checklist:
- Visual corrosion on cleat body and fastener heads
- Any play or wobble when you push the cleat side to side
- Bolt head and nut security (hand-tight check)
- Sealant integrity around the base (cracking, lifting, or gaps)
- Chafe on lines where they contact cleat edges
Seasonal maintenance actions:
- Re-torque all fasteners
- Replace corroded or pitted fasteners before surface corrosion becomes structural
- Re-bed sealant if gaps appear or moisture intrusion is suspected
- Inspect backing plate condition from below if accessible
Replace a cleat immediately if you see visible cracking in the body, more than minimal movement under hand pressure, or corrosion that has progressed beyond surface discoloration. A cleat that fails under load can take a section of deck with it.
A boat safety inspection checklist integrates cleat inspection with broader pre-departure safety equipment checks.
What mistakes cause cleat failures?
Most mooring failures trace to four root causes: incorrect mounting, undersized hardware, poor knot technique, or chafed lines.
Common installation errors:
- Wood screws or lag bolts used without through-bolting
- No backing plate, or a backing plate too small for the bolt diameter
- Rigid adhesive used as a substitute for proper fastening
Operational red flags:
- Cleat wobbles or creaks under load
- Rust staining around bolt holes (indicates fastener corrosion below deck)
- Cracked gelcoat or deck surface around the cleat base
- Frayed lines where they contact sharp cleat edges
A cleat that moves is a cleat that will fail. Any detectable play under hand pressure means the backing plate, fasteners, or substrate has been compromised. Tag it, take it out of service, and re-bed before the next departure.
What tools and materials does cleat installation require?
A safe installation requires through-bolting tools and marine-grade hardware. Costs vary by material, cleat size, and whether you hire a professional.
Essential tools: drill/driver, hole saw or Forstner bit set, torque wrench, sealant gun, backing plate fabrication tools (angle grinder or jigsaw for custom plates).
| Item | Approximate price range |
|---|---|
| Grade 316 stainless horn cleat (6–10") | $15 per cleat |
| Stainless backing plate (pre-cut) | $10 per plate |
| Stainless through-bolts, washers, lock-nuts | $5–$15 per cleat set |
| Life-Seal or equivalent flexible marine sealant | $15 per tube |
DIY installation is practical for accessible surfaces. Recessed or pop-up cleats with limited underside access often justify professional labor.
How does cleat knowledge show up in boating certification?
NASBLA-aligned boating safety curricula, the framework that state-approved courses follow in the U.S., include pre-departure checks, docking practicals, and written questions that reference cleat function and safe line handling. The U.S. Coast Guard’s boating safety standards reinforce these expectations at the federal level.
Instructors expect candidates to:
- Identify horn, cam, pop-up, and bitt cleats by sight
- Demonstrate a correct cleat hitch with a finishing half-hitch
- Describe through-bolting with a backing plate and explain why wood screws alone fail
- Name a flexible marine sealant (Life-Seal is a recognized example) and explain why it is preferred over rigid adhesives
Examiners notice preparation. A student who can explain why a backing plate is required, not just that it is required, demonstrates the depth of understanding that NASBLA-aligned courses are designed to build.
Safe Boating America offers NASBLA-aligned instruction taught by State Certified Instructors and USCG-Licensed Captains that covers docking, knot skills, and pre-departure inspection as part of its state-approved curriculum.
Key Takeaways
Proper cleat selection, mounting, and knot technique are the three skills that separate a prepared certification candidate from one who has only read about boating.
| Point | Details |
|---|---|
| Match cleat to load | Use Pearce’s formula: cleat length (in) = boat length (ft) × 0.2; Grade 316 stainless for saltwater. |
| Through-bolt with backing plate | Backing plates must be at least four times the bolt diameter; wood screws alone will fail under surge. |
| Use flexible sealant | Life-Seal and similar UV-resistant marine sealants allow future service; rigid adhesives like 3M 5200 do not. |
| Inspect before every departure | Check for cleat play, corrosion, sealant gaps, and chafe on lines before leaving the dock. |
| Safeboatingamerica covers this | State-approved courses taught by USCG-Licensed Captains include docking, cleat hitch, and inspection skills. |
Why practice and inspection matter more than most students expect
Most certification candidates can recite the cleat hitch steps after one read-through. Far fewer can tie it cleanly on a moving dock in a 15-knot wind with a crew member handing them a wet line. That gap between knowing and doing is exactly where mooring failures happen.
What examiners consistently flag: students who skip the finishing half-hitch under pressure, candidates who cannot explain backing plate sizing, and boaters who have never actually inspected the underside of a cleat mount. These are not obscure details. They are the difference between a cleat that holds and one that pulls through the deck.
The sealant question comes up more than students expect. Choosing Life-Seal over a rigid adhesive is not a brand preference. It is a serviceability decision. A cleat bedded in 3M 5200 may never come off cleanly. That matters when a fastener corrodes below deck and you need access.
Practice the cleat hitch under time pressure. Inspect a cleat on a real boat, not just a diagram. Those two habits will carry you through any practical exam and, more importantly, through real conditions on the water.
Get certified with hands-on cleat and docking training
Knowing the theory is the starting point. Safeboatingamerica’s state-approved boating safety courses put that knowledge into practice under the instruction of State Certified Instructors and USCG-Licensed Captains. Courses cover docking sequences, cleat hitch technique, pre-departure inspection, and the full NASBLA-aligned curriculum required for your state boating license.
Online prep, live Zoom classes, and in-person certification programs are available nationwide, with same-day certification options where state rules permit. Whether you need a New York boating safety certificate under Brianna’s Law, a Connecticut Safe Boating Certificate, or a license for any other U.S. state, Safeboatingamerica has a course format that fits your schedule. Visit safeboatingamerica.com to find your state’s course and register today.
Useful sources
- Cleat (nautical) — Wikipedia): Definitions and overview of horn, cam, jam/clam, and pop-up cleat designs.
- Hold Fast and Avoid Disasters with Proper Boat Cleat Installation — Pearce Marine: Cleat sizing formula, through-bolting guidance, backing plate specifications, sealant recommendations, and re-torque intervals.
- Pop-Up Cleats — Accon Marine: Installation requirements for pop-up/flush cleats including backing plate and drain routing.
- Secure Your Boat and Your Peace of Mind: EZ Dock Cleats Guide: Material trade-offs for aluminum, nylon, and stainless steel cleats across environments.
- Steel Dock Cleats — The Dock Shop: Bolt-size specifications by cleat length for commercial dock hardware.
- Safe Boating America Boating Safety Certification and License: NASBLA-aligned course offerings, instructor credentials, and state-specific certification programs.
FAQ
What is a boat cleat used for?
A boat cleat is a fixed tie-off point on a deck or dock that secures mooring lines, dock lines, and spring lines under load. Horn cleats are the most common type for general mooring.
What size cleat does my boat need?
Pearce Marine’s formula gives a reliable starting point: cleat length in inches equals boat length in feet multiplied by 0.2. A boat’s cleat length should be proportional to its length, typically using a formula where cleat length in inches equals the boat length in feet multiplied by a factor.
Do boat cleats need a backing plate?
Yes. Through-bolting with a backing plate at least four times the bolt diameter is the professional standard. Wood screws or lag bolts alone will pull through under surge load.
What sealant should I use for cleat installation?
Use a flexible, UV-resistant marine-grade sealant such as Life-Seal. Rigid adhesives like 3M 5200 make future hardware removal difficult and are not recommended for cleats.
Does boating certification cover cleat skills?
NASBLA-aligned courses, including those offered by Safeboatingamerica, cover cleat identification, the cleat hitch, docking sequences, and pre-departure inspection as part of the standard curriculum.