
Parts of a Canoe: Names, Functions, and How to Identify Them
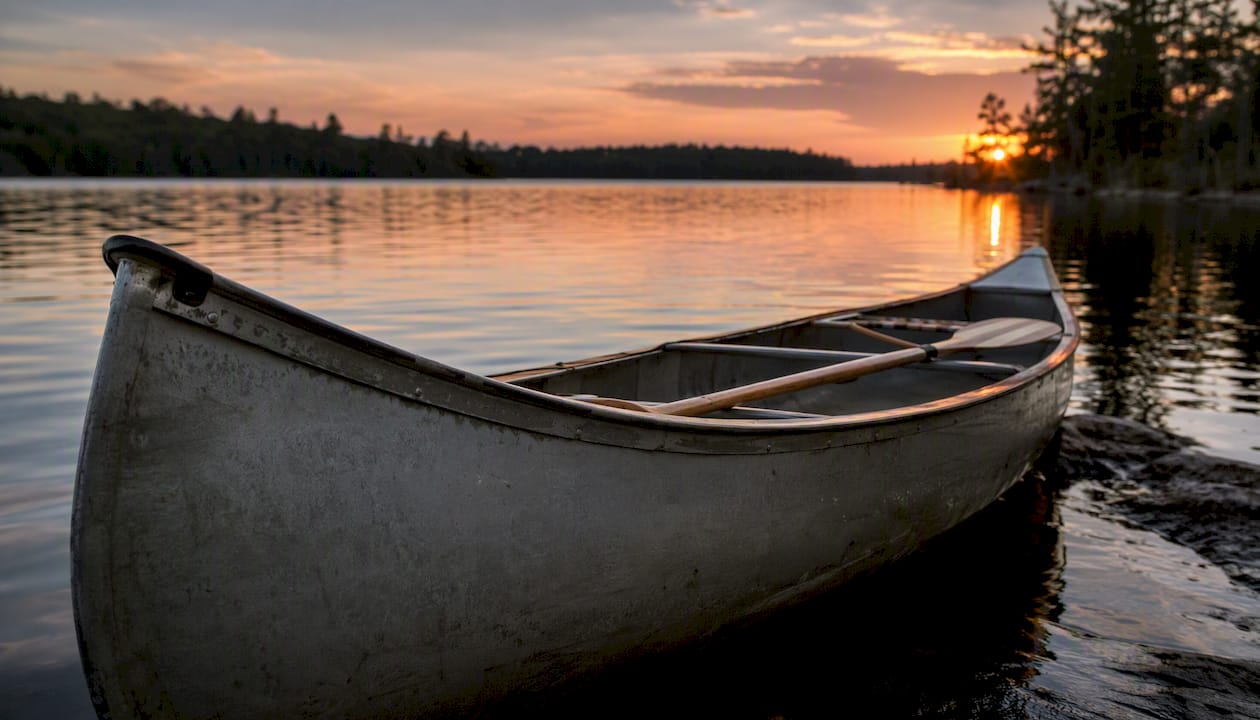
A canoe’s primary components are the bow, stern, hull, gunwales, seats, thwarts and yoke, keel, chines, rocker, handles, painter, and flotation chambers — each one directly affects how the boat handles, how you carry it, or how safely it floats.
TL;DR — Core parts at a glance:
- Bow — front end; cuts through water
- Stern — rear end; primary steering position
- Hull — the body of the boat; shape determines speed and stability
- Gunwales — top rails running bow to stern; structural backbone and attachment points
- Seats — bow and stern seating positions; placement affects trim and balance
- Thwarts — cross-braces that keep the hull rigid
- Yoke — center thwart shaped for shoulder carrying during portage
- Keel — bottom ridge that aids straight tracking
- Chines — where hull sides meet the bottom; shape affects stability
- Rocker — the curve of the keel line; more curve means easier turning
- Handles/Painter — grab points and bow/stern rope for securing and launching
- Flotation chambers — sealed air spaces under decks that keep a swamped canoe afloat
Directional terms: Port is the left side when you face the bow; starboard is the right. A canoe paddle is a single-bladed paddle, not an oar. Oars are double-mounted and used in rowing; paddles are hand-held and single-bladed.
Pro Tip: Memorize bow and stern first. Every other directional term — port, starboard, forward, aft — is defined relative to those two reference points.
Table of Contents
- What does a labeled canoe diagram show you?
- A complete glossary of canoe components, grouped by function
- How do hull shape and key parts affect stability and tracking?
- How do you carry and secure a canoe safely?
- What flotation features keep a canoe afloat after a capsize?
- Quick answers: bow vs. stern, port vs. starboard, and what is a canoe paddle called?
- Key Takeaways
- What experienced instructors notice that most beginners miss
- Safeboatingamerica offers hands-on canoe and vessel safety training
- Useful sources and further reading
- FAQ
What does a labeled canoe diagram show you?
A clear canoe anatomy diagram maps every major component to its physical location on the boat, giving you a single visual reference you can cross-check against a real canoe. The most useful diagrams label the bow and stern at opposite ends, the gunwales running the full length of the top edge, the seats suspended inside the hull, thwarts and yoke spanning the beam, the keel along the bottom centerline, and the flotation chambers tucked under the end decks.
How to use a printed checklist next to a real canoe:
- Start at the bow. Confirm the pointed or tapered end, the end deck, and the grab handle or painter loop.
- Walk the gunwale from bow to stern. Locate each thwart, the yoke (center position), and both seats.
- Flip or tilt the canoe to view the hull bottom. Identify the keel line, chines, and rocker curve.
Image guidance: Use an image with alt text such as “labeled diagram of canoe parts including bow, stern, gunwales, thwarts, yoke, keel, and flotation chambers” and a caption like “Canoe anatomy — key parts labeled for quick identification.”
The Paddling Magazine parts overview notes that gunwales and decks serve as both structural members and the primary attachment points for seats, thwarts, and yokes — which makes them the logical starting point when reading any diagram.
Pro Tip: Print the diagram at full page and laminate it. Bring it to the water and physically touch each part as you name it. Tactile identification sticks faster than reading alone.
A complete glossary of canoe components, grouped by function
Structural parts
Hull — the main body of the canoe, from gunwale to keel. Hull shape is the single biggest driver of performance; flat, rounded, shallow-arch, and V-shaped cross-sections each produce different stability and speed characteristics.
Gunwales (gunnels) — reinforced rails that run the full length of the canoe from bow to stern along the top edge. They hold the hull in shape and provide the mounting surface for seats, thwarts, and yokes.
Decks — short panels that cap the bow and stern ends where the gunwales meet. They stiffen the ends and often house grab handles or painter attachment points.
Stems — the structural ribs at the very tip of the bow and stern, inside the hull. They take the most impact during beaching and collisions, so they wear faster than any other structural component.
Keel — a ridge running along the hull’s centerline on the outside bottom. A pronounced keel improves straight-line tracking and offers some protection against abrasion on rocky bottoms, though it reduces maneuverability in tight turns.
Chines — the transition zones where the hull sides meet the bottom. Hard chines (sharp angles) give more defined initial stability; soft chines (rounded transitions) allow the hull to roll more predictably into secondary stability.
Carrying and handling parts
Thwarts — horizontal cross-braces spanning the beam at intervals along the hull. They prevent the hull from spreading under load and give paddlers a grip point when lifting.
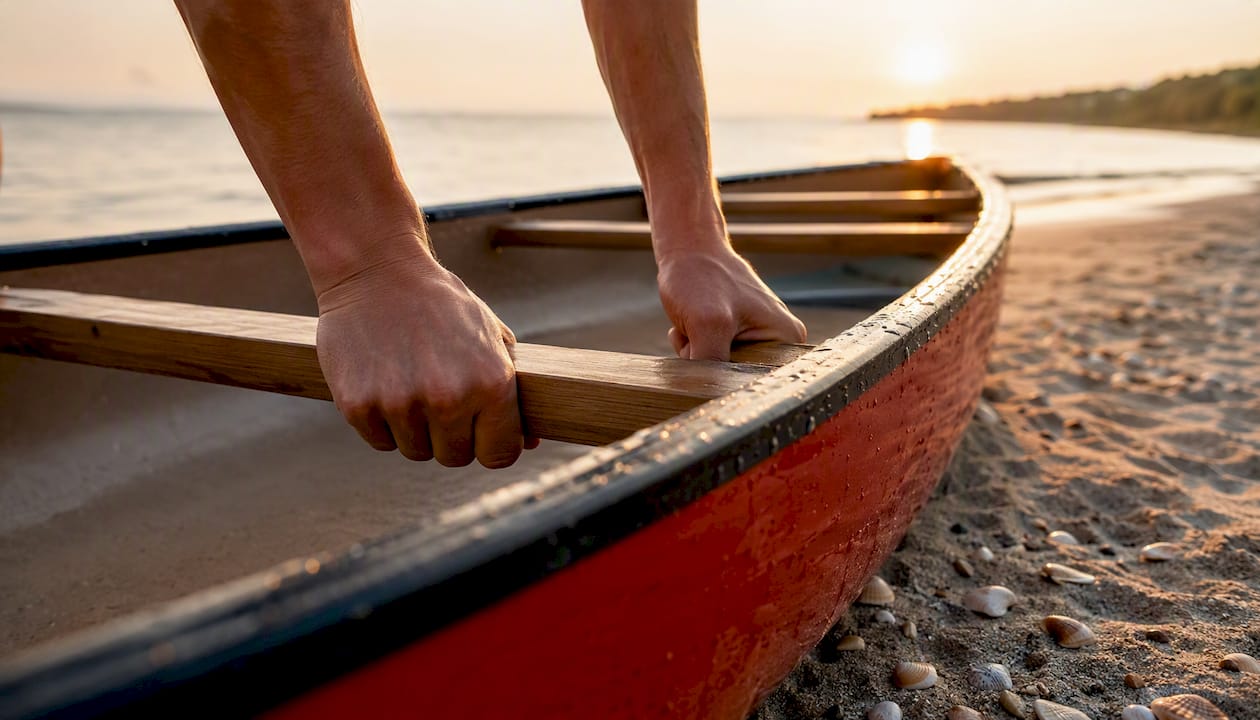
Yoke — a center thwart with a curved or padded cutout designed to rest on your shoulders during a solo portage carry. Without a yoke, paddlers improvise with a padded thwart or a removable yoke clamp.
Handles — short grips at the bow and stern, usually mounted to the end decks. They are the correct lift points for two-person carries and the safest place to grab when launching or landing.
Painter — a short length of rope attached to the bow (and sometimes stern). It secures the canoe to a dock, tree, or vehicle rack and gives a swimmer something to grab after a capsize.
Seating and outfitting
Bow seat — positioned closer to the center of the canoe than the stern seat, giving the bow paddler more legroom. The bow paddler provides power; the stern paddler steers.
Stern seat — set closer to the stern end, giving the stern paddler leverage for steering strokes. In a solo canoe, the paddler often kneels near the center or uses the bow seat reversed.
Foot braces — adjustable pegs or bars mounted to the hull sides or thwarts. They let paddlers brace their feet for better stroke power and boat control, and they interact directly with paddle reach and stroke angle.
Performance features
Beam — the widest measurement of the canoe at the gunwale. A wider beam increases initial stability; a narrower beam reduces drag and improves speed.
Rocker — the upward curve of the keel line from the center toward the bow and stern. More rocker means easier turning and maneuverability; less rocker improves straight tracking and speed.
Tumblehome — an inward curve of the hull sides above the waterline. It brings the gunwales closer to the paddler, shortening the reach for each stroke. Flared sides do the opposite, pushing water away from the hull in rough conditions.
Freeboard — the distance between the waterline and the top of the gunwale. Higher freeboard keeps water out in chop; lower freeboard reduces wind resistance.
Draft — how deep the hull sits in the water when loaded. Heavier loads increase draft and reduce freeboard.
Small parts and accessories
Grab loops — webbing or rope loops at the bow and stern tips, used as an alternative to rigid handles for quick grabs during rescues.
Flotation chambers — sealed air compartments built under the bow and stern decks. They keep a swamped canoe floating at the surface rather than sinking, which is critical for self-rescue.
Stem knees — internal reinforcement brackets where the stems meet the hull bottom. They absorb impact and are a common wear point on older canoes.
How canoe materials affect parts and maintenance
| Material | Common parts affected | Key maintenance note |
|---|---|---|
| Wood/canvas | Gunwales, seats, thwarts | Requires annual sealing; check for rot at fastener points |
| Aluminum | Hull, gunwales | Dents rather than cracks; check rivets for loosening |
| Fiberglass | Hull, stems | Patch cracks with resin; inspect stems after rocky use |
| Kevlar | Hull, stems | Lighter than fiberglass; abrasion-prone on the outside layer |
| Rotomolded plastic | Hull, keel | Resists impact but can warp in sustained heat; UV-degrade over time |
Material choices directly influence care and common failure points — wood needs sealing, plastic resists impact but deforms in heat, and Kevlar is light but abrasion-prone on the outer layer.
How do hull shape and key parts affect stability and tracking?
The parts that most influence how a canoe handles on the water are hull shape, beam, chines, keel, rocker, and freeboard. Understanding what each one does lets you predict behavior before you ever put the boat in the water.
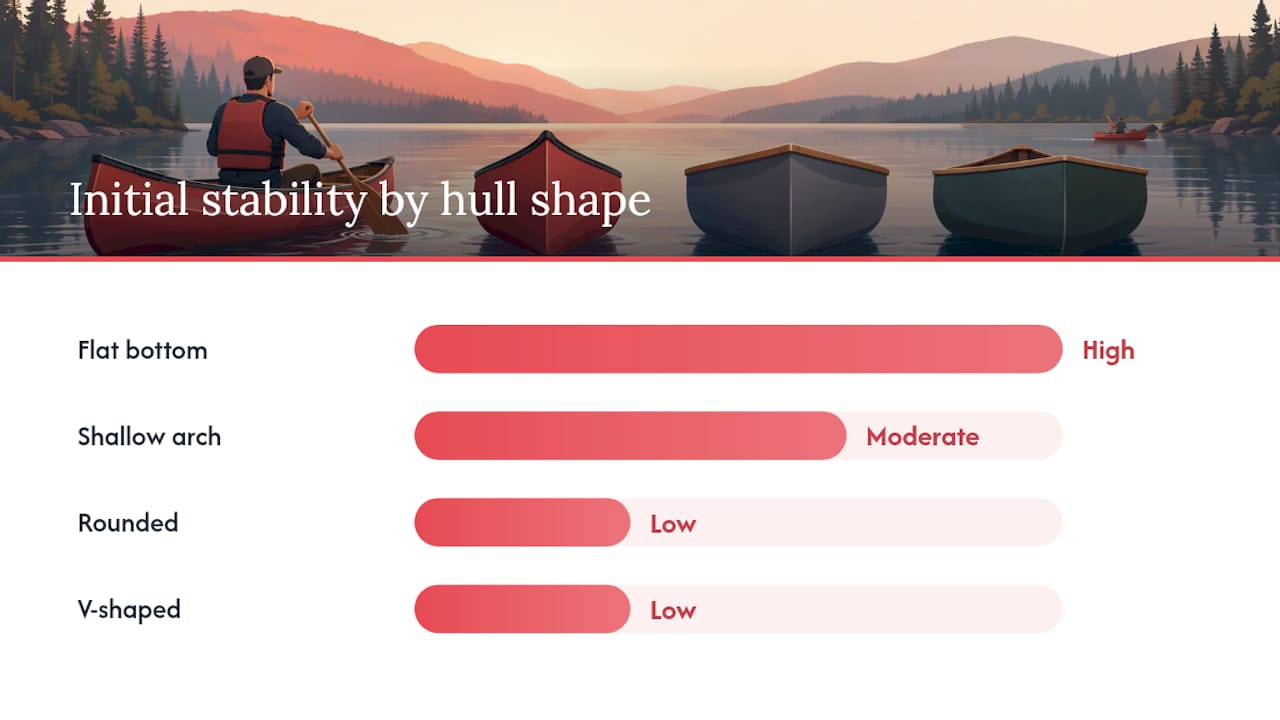
Initial vs. secondary stability — Initial stability is how steady the canoe feels when you sit flat and still. Secondary stability is how well it resists capsizing when you lean hard to one side. These two qualities trade off against each other based on hull shape and beam.
| Hull shape | Initial stability | Secondary stability | Best use |
|---|---|---|---|
| Flat bottom | High | Low | Calm flatwater, beginners |
| Shallow arch | Moderate | Moderate | General touring |
| Rounded | Low | High | Moving water, experienced paddlers |
| V-shaped | Low | High | Speed, open water tracking |
A flat-bottomed hull feels rock-solid at rest but tips abruptly once it reaches its lean limit. A rounded hull feels tippy initially but rolls smoothly and recovers well in whitewater. Shallow-arch designs split the difference, which is why most recreational touring canoes use them.
Beam and chines work together with hull shape. A wide beam raises initial stability; hard chines give a defined “edge” that experienced paddlers use for controlled lean. Soft chines blend into the hull and feel more forgiving for beginners.
Keel and rocker govern straight-line performance. A pronounced keel or hard chines help a canoe track straighter; a smooth or absent keel eases turning. High rocker lifts the ends off the water, reducing the waterline length and making the canoe spin quickly — ideal for river paddling. Low rocker keeps more hull in contact with the water for efficient forward travel on lakes.
Pro Tip: Flip the canoe upside down before you paddle it. Look at the keel line from the side: if the ends curve up noticeably, expect quick turning. If the keel line is nearly flat end-to-end, expect strong tracking but slower pivoting.
- High freeboard helps in wind and chop but catches crosswinds.
- Low freeboard reduces wind resistance and lowers the center of gravity.
- Tumblehome shortens your paddle reach; flared sides add secondary stability in rough water.
How do you carry and secure a canoe safely?
The yoke, thwarts, and bow/stern handles are the three designated carrying points on any canoe. Using them correctly protects both the hull and the people doing the lifting.
Solo portage uses the yoke. Center the yoke on your shoulders, grip the gunwales with both hands, and keep your back straight. The canoe’s weight should rest on the padded yoke cutout, not on your neck.
Two-person carry uses the bow and stern handles. Each person grabs one handle, lifts simultaneously on a count, and walks with the canoe between them. Never carry by the gunwale alone — it stresses the hull at the attachment points.
Numbered carry sequence:
- Clear the canoe of loose gear and secure any items that remain inside.
- Position one person at each handle (or one person under the yoke for solo).
- Lift together on a verbal count, keeping the canoe level.
- Walk with short, controlled steps; avoid twisting the hull.
- Set down stern-first on soft ground or padded supports.
Painter and tie-down notes:
- Tie the painter to a fixed point (cleat, tree, dock ring) with a cleat hitch or bowline — not a slip knot that can jam under load.
- When loading onto a roof rack, use two cam straps across the hull and separate bow/stern tie-downs to the vehicle’s tow points. Never rely on the gunwales alone as the sole contact point with the rack.
- Do not leave a canoe tied in direct sun for extended periods; heat warps plastic hulls and dries out wooden gunwales.
The U.S. Coast Guard and NASBLA both emphasize that proper vessel handling — including safe loading and securing — is a core component of boating safety education, not an afterthought.
Pro Tip: Before lifting, check that all thwart bolts and yoke hardware are tight. A loose thwart can shift mid-carry and throw off your balance.
What flotation features keep a canoe afloat after a capsize?
Sealed flotation chambers under the bow and stern decks, plus supplemental float bags, help keep a swamped canoe at the surface rather than sinking. That distinction matters in a real capsize: a canoe that stays afloat can be re-entered or towed; one that sinks is a recovery problem.
Built-in flotation chambers are standard on most modern recreational canoes. They are sealed compartments, typically foam-filled or air-tight, positioned under the end decks. Float bags are inflatable supplemental bags that fill the bow and stern sections not covered by built-in chambers, and they are especially common in whitewater canoes where full-hull buoyancy is needed.
Pre-launch flotation checklist:
- Inspect end decks for cracks or gaps that could allow water into flotation chambers.
- Press on foam flotation blocks (if accessible) to check for waterlogging.
- Inflate float bags fully and check valve seals before each trip.
- Verify that the painter is attached and free of knots that could tangle during a capsize.
- Check seats and thwart hardware for looseness — a detached seat can block a swimmer’s exit from a swamped hull.
The U.S. Coast Guard’s boating safety requirements include personal flotation device (PFD) carriage rules for canoes; built-in hull flotation does not replace a properly fitted PFD. For a full list of required safety equipment, the boat safety equipment guide from Safeboatingamerica covers what every paddler must carry under federal and state rules.
Pro Tip: Stow float bags so the inflation valves face the center of the canoe, not the ends. That way you can reach and check them without unpacking gear.
Quick answers: bow vs. stern, port vs. starboard, and what is a canoe paddle called?
Short, direct answers to the most common canoe anatomy questions:
- Port vs. starboard: Port is the left side and starboard is the right side when you are seated facing the bow. A common memory aid: “port” and “left” both have four letters.
- Canoe paddle vs. oar: A canoe paddle is a single-bladed paddle held in both hands with no fixed pivot point on the boat. An oar is double-mounted in oarlocks and used in rowing. Calling a canoe paddle an “oar” is technically incorrect.
Key Takeaways
A canoe’s hull shape, beam, rocker, and keel work together to determine stability and tracking, while the yoke, handles, and painter govern safe carrying and securing.
| Point | Details |
|---|---|
| Bow and stern orientation | The bow is the front; the stern is the rear — all directional terms (port, starboard) are defined relative to these two points. |
| Hull shape drives handling | Flat bottoms give high initial stability; rounded hulls give better secondary stability and tracking in moving water. |
| Rocker controls turning | More rocker means easier turning; less rocker means straighter tracking — check the keel line before paddling. |
| Flotation check before launch | Inspect end-deck chambers, inflate float bags, and confirm the painter is secured before every trip. |
| Safeboatingamerica for hands-on training | Safeboatingamerica’s NASBLA-approved courses teach canoe and vessel anatomy, safety checks, and state certification requirements. |
What experienced instructors notice that most beginners miss
Most beginners can name the bow and stern after five minutes with a diagram. What takes longer to internalize is the relationship between parts: how rocker and keel interact, why a wide beam that feels stable on flat water becomes a liability in a crosswind, and why a loose thwart bolt is a portage hazard, not just a maintenance note.
The parts that get skipped most often in casual reading are the stems and the chines. Stems are the first thing to crack on a canoe that gets dragged over gravel, and chine geometry is what separates a hull that “feels” stable from one that actually recovers well when a paddler leans hard. Neither shows up prominently in a basic diagram, but both matter the moment conditions change.
Knowing the name of a part and knowing what it does under load are two different things. A printed diagram is a starting point. Hands-on time with an actual canoe — touching the yoke, feeling the rocker, checking the flotation chambers — is where the terminology becomes functional knowledge. That gap between reading and doing is exactly what structured boating safety education is designed to close.
Safeboatingamerica offers hands-on canoe and vessel safety training
Reading a parts diagram gives you the vocabulary. Safeboatingamerica’s state-approved boating safety courses give you the practical context: how to inspect a vessel before launch, what safety equipment federal and state law requires you to carry, and how to handle a canoe or other vessel safely on the water.
Courses are taught by State Certified Instructors and USCG-Licensed Captains using NASBLA-approved materials, available online, via live Zoom, or in person across all U.S. states. Students who complete an approved course receive an official boating safety certificate that satisfies state licensing requirements. This article is an identification and educational reference; it does not substitute for hands-on training or state-required certification.
Register for a boating safety course at Safeboatingamerica, or browse online certification options if you need same-day or self-paced completion.
Useful sources and further reading
- Parts Of A Canoe: Can You Name Them All? - Paddling Magazine
- Anatomy of a Canoe - Minn Kota - Johnson Outdoors
- Parts of a Canoe: An in-depth photo guide - RuggedOutdoorsGuide
- The Parts Of A Canoe, Explained - Cool of the Wild
- Parts of a Canoe: Names, Functions, and Diagram (Beginner Guide) - Airkayaks
- The Anatomy of a Canoe - LiveAbout
FAQ
What are the sides of a canoe called?
The left side is port and the right side is starboard, both measured when you are seated facing the bow. These terms are standard nautical directional labels used across all vessel types.
What are the upturned parts at the ends of a canoe called?
The upward curve of the hull bottom toward the ends is called rocker. The structural tips at the very ends are the stems, and the flat panels capping those ends are the decks.
What do you call the front of a canoe?
The front is the bow. It is typically the more pointed end and is designed to cut through water; the stern is the rear, where the primary steering paddler sits.
What is a canoe paddle called, and is it the same as an oar?
A canoe paddle is a single-bladed paddle held freely in both hands. An oar is mounted in oarlocks on a rowing vessel; the two terms are not interchangeable, and a canoe paddle is never correctly called an oar.
What parts should you check before launching a canoe?
Inspect the flotation chambers and float bags for damage, confirm the painter is attached and free of tangles, test thwart and yoke hardware for tightness, and verify that all paddlers have properly fitted PFDs. A full pre-launch checklist is covered in Safeboatingamerica’s boat safety inspection guide.